This article was written by guest author – and GitKon speaker – Sarah Lean.
Sarah is an IT professional with over 18 years of experience in the tech world. She currently works as a Microsoft Certified Trainer and contributes passionately to the tech community. Hailing from Scotland, her enthusiasm for STEM education shines through her roles as a STEM ambassador and the driving force behind the Glasgow Azure User Group.
Hear more about this topic in Sarah’s GitKon session, Intro to GitLens for VS Code. Watch on-demand here (expand the video description and use the chapters to jump to her talk).
In the dynamic world of software development, where collaboration and version control are paramount, it’s important to have the right tools to be able to support you. GitLens is a powerful Visual Studio Code extension that can help shed light on the intricacies of your Git workflow. In this blog post, we will introduce you to GitLens and some of its amazing features.
What is Git?
Git is a widely used distributed version control system that tracks code changes, enabling collaboration and maintaining a comprehensive history. It is a tool that software developers can use to help track their development projects or by infrastructure engineers to track their infrastructure as code projects.
If you’re looking to deepen your understanding of Git, check out my “14 days of Git” learning series.
What is GitLens?
GitLens is a powerful extension for Visual Studio Code, one of the most popular code editors used by developers worldwide. This extension brings Git right into your coding environment, making it easier to manage and understand your Git repositories. Let’s explore some of its key features.
Blame Annotations
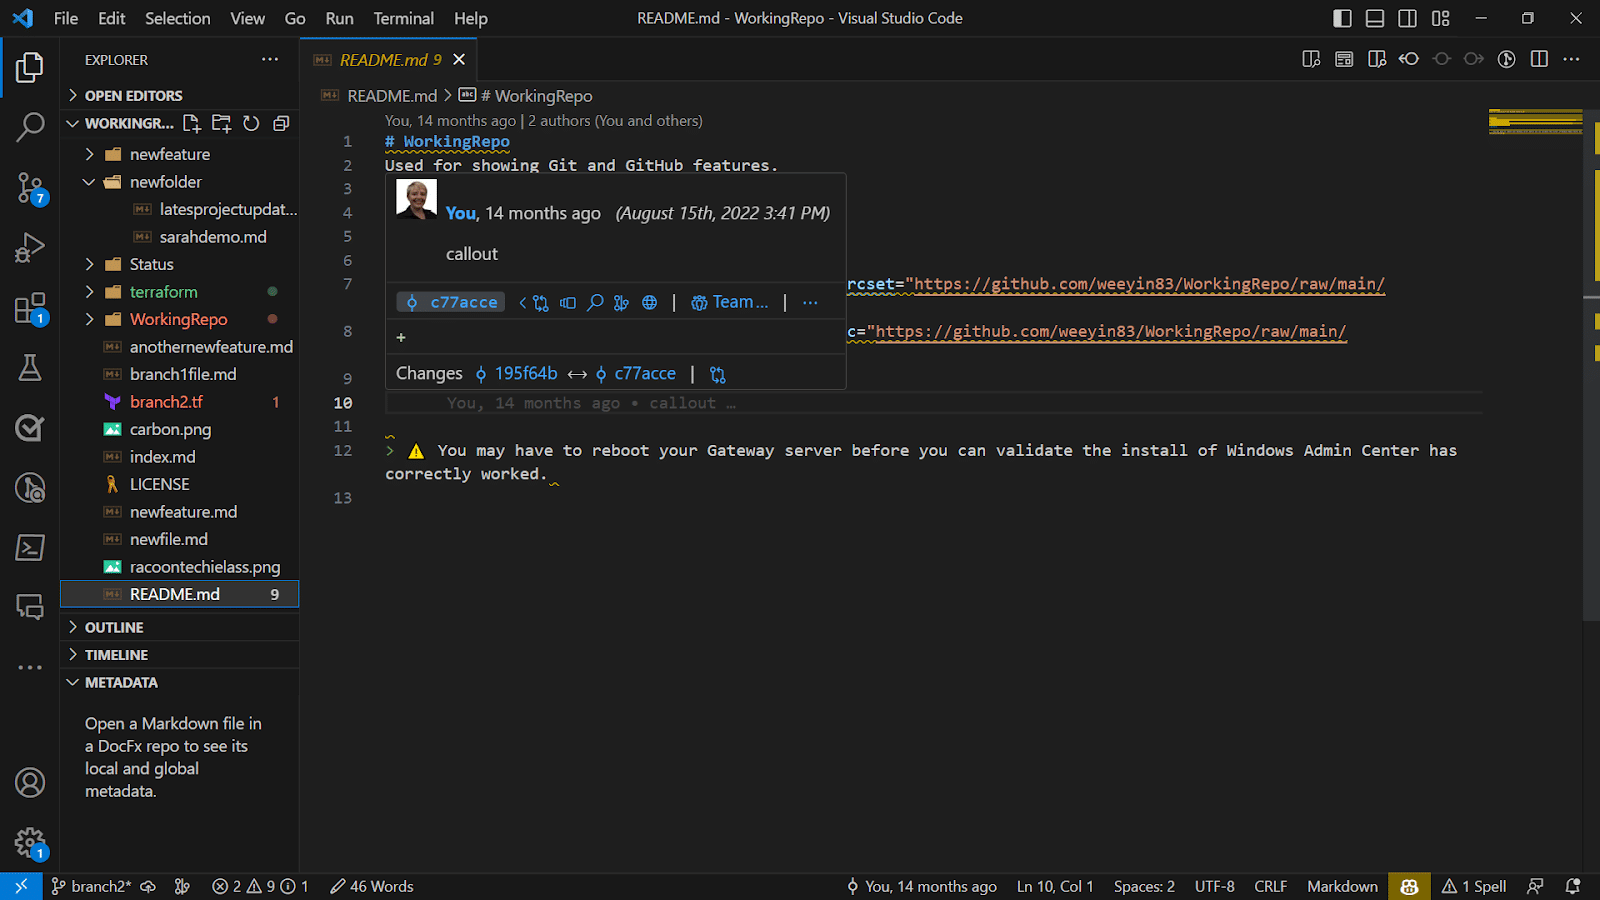
GitLens allows you to easily see who made each code change. With the “blame annotations” feature, you can view the author, commit message, and even the exact commit date for each line of code. This is incredibly helpful when you need to understand the history of a file or when you want to discuss specific code changes with your teammates.
Time Travel
With GitLens, you can effortlessly travel through time, exploring the history of your codebase. Using the interactive time machine, you can browse commits, view changes, and understand how your code has evolved. This feature is indispensable for identifying when a bug was introduced or finding the commit responsible for a specific change.
Commit Search
Searching for specific commits or changes across your entire repository has never been easier. GitLens provides a powerful commit search feature that allows you to filter commits based on various criteria, such as author, message, file changes, and dates. This is particularly useful for tracking down relevant code changes in large projects.
Code and Line History
GitLens offers a detailed history view for your code files, showing you all the changes made over time. You can easily navigate through revisions and pinpoint when specific lines of code were modified. This feature is invaluable for code reviews and debugging, as it helps you understand the context of changes.
Getting Started
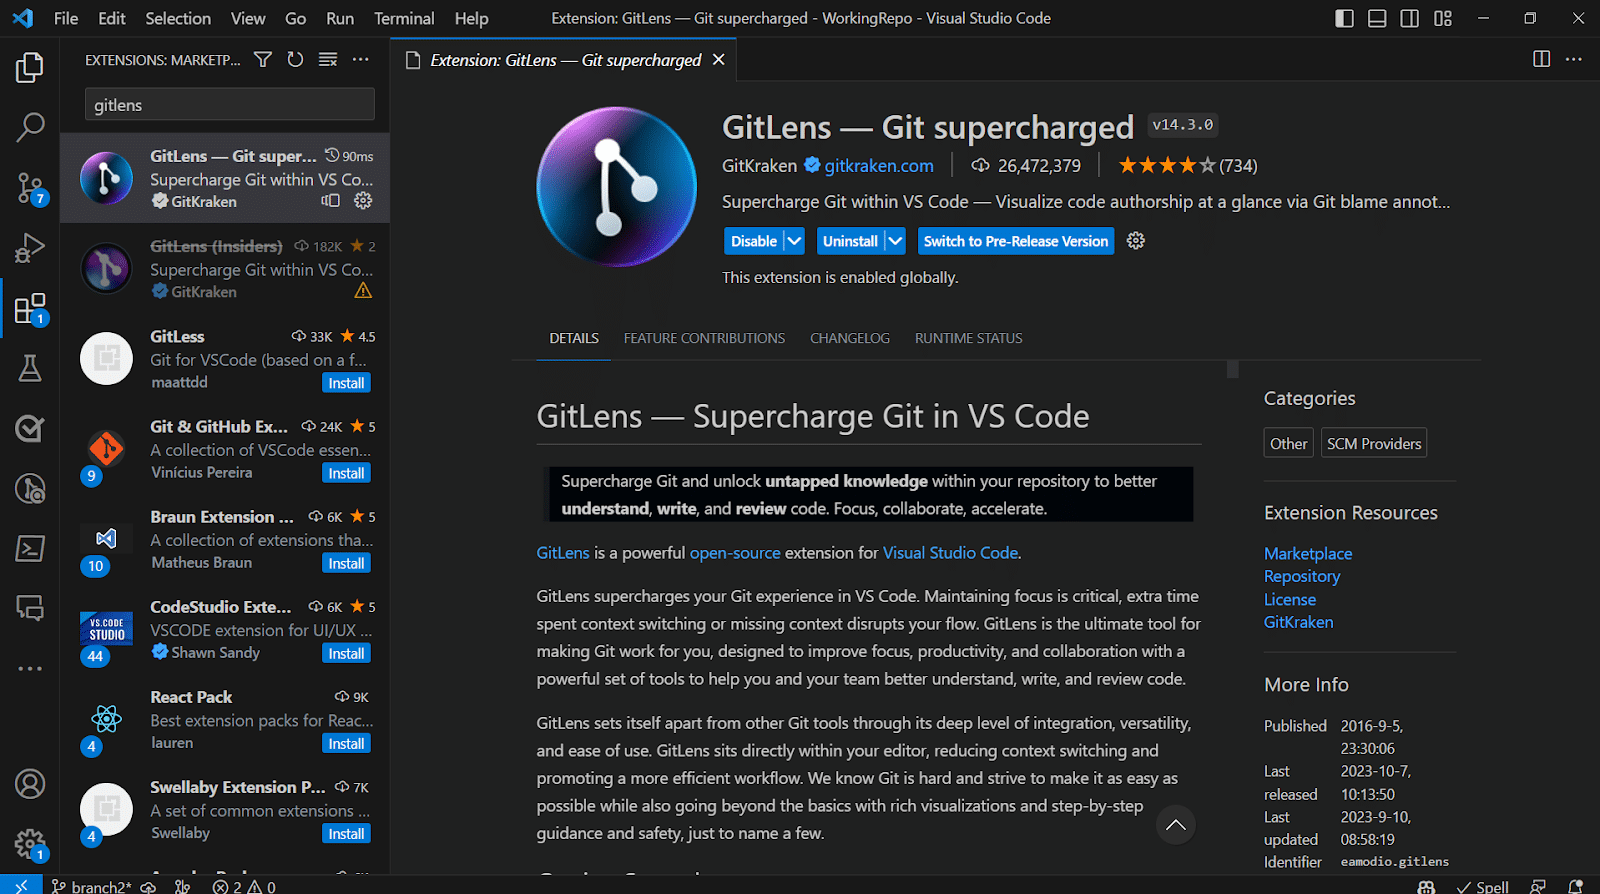
Getting started with GitLens is a breeze. Here’s how to install and start using it:
1. Open Visual Studio Code.
2. Go to the Extensions view by clicking on the square icon on the left sidebar.
3. Search for “GitLens” and click the “Install” button.
4. Once installed, you’ll start seeing GitLens features integrated into your code editor.
Conclusion
GitLens is a game-changer for engineers, especially beginners, who are looking to enhance their Git workflow. With its intuitive features like blame annotations, commit search, commit annotations, and more, you can easily understand your code’s history, collaborate effectively with your team, and become a more productive and confident developer.
So, if you’re ready to take your Git skills to the next level and supercharge your coding journey, give GitLens a try. You’ll wonder how you ever lived without it!


