Article updated June 2024
Is your current Subversion (SVN) version control system not meeting the needs of your development team? Perhaps you’ve heard of Git, but you’re so entrenched in SVN that converting to a new version control system seems like a daunting task. Fear not! No task is insurmountable when you have the power of the legendary GitKraken Desktop on your side.
If you’re considering migrating from SVN to Git, this guide will help you navigate the transition smoothly and efficiently. Let’s dive into everything you need to know about why you should migrate from SVN to Git and how to successfully convert your repositories.

X
Contact Us

Advantages of Git
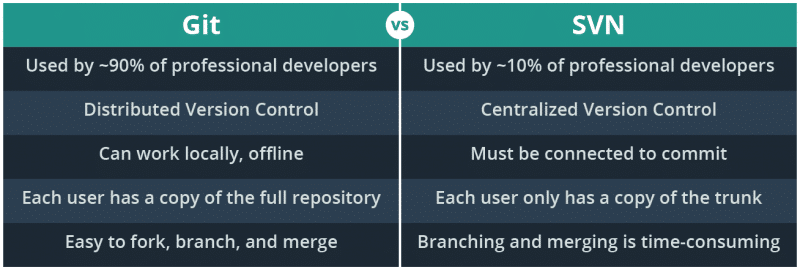
- Popularity – Git is the most widely-used version control system in the software development space right now. According to the 2022 Developer Survey by Stack Overflow, over 93% of professional developers worldwide are using Git for version control. This means that adopting Git in your company will not only get you onto the preferred version control system in the industry but will also decrease the time it takes for new developers to learn your system.
- Distributed Version Control – Git uses a distributed method for version control, which is a stark contrast compared to SVN’s centralized method. This means that each user clones a full version of the repository to their local machine, which is advantageous in several ways. It removes the single point of failure of the centralized repository, reduces network traffic for day-to-day operations, and allows your team to work offline.
- Size and Speed – Arguably the strongest reason to migrate to Git is branching and merging. Creating a branch is effortless and is extremely lightweight, allowing your developers to work faster and merge easier.
Migrate from SVN to Git
Praise the Kraken! You’ve decided to move ahead with your SVN to Git migration. So, what’s the next step? Planning is always a good thing, and Microsoft has put together a comprehensive checklist of the things to consider when migrating your team over to Git.
Once you’ve completed the planning phase of your SVN transition, it’s time to actually start migrating your code. The complexity of the migration depends on several things: the complexity of your SVN repository, how many merges you have done, and whether or not you care about reformatting the history from your SVN repo.
Reformatting the history involves the following additional steps:
- Converting the commit username to first and last name, with an email address
- Removing some additional SVN-specific metadata
- Migrating the
svn:ignorefile to a.gitignorefile - Converting your SVN tags over to git tags
- Migrating all of your SVN branches over to your new Git remote
If you’re not concerned with preserving the objects above, go ahead and proceed with the instructions below. If you do want to migrate all of that historical data, jump down to the import and preserve history instructions.
Git SVN Clone
If you’re not worried about reformatting the history from your SVN repository, then the conversion process just got a whole lot easier! Git has a built-in git svn command for cloning an SVN repository into a new Git repository. You would simply run:
git svn clone <SVN_URL> -T trunk -b branches -t tags
Grab some coffee…

This process can take some time because Git is taking each commit from your SVN repository and processing it again using Git.
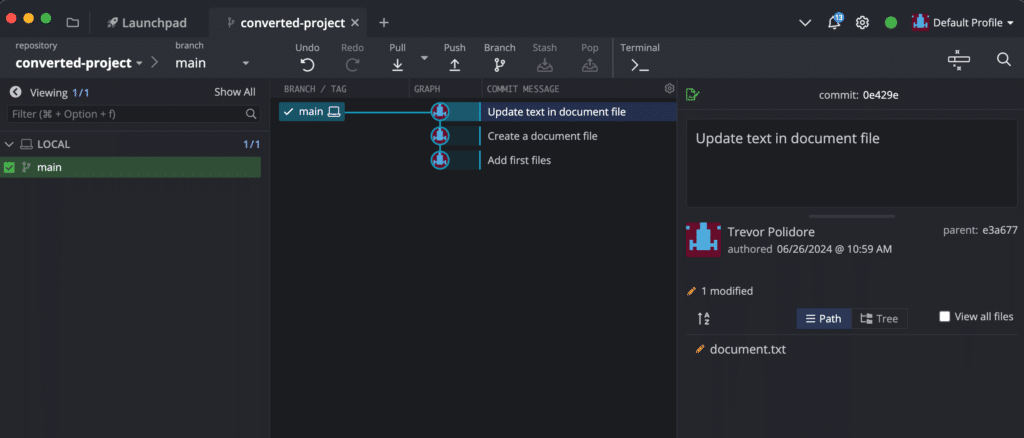
Once the command completes, go ahead and open this repo in GitKraken Desktop and you should see a nice graph of your newly converted Git repo.
At this point, you can jump down to setting up your new Git remote, and you’re just about done!
GitKraken Desktop makes Git more visual and intuitive, making the onboarding process easier for beginner and expert developers alike, and gives you the flexibility to switch between a GUI or terminal.
Migrate from SVN to Git with History and Branches
The import by git svn does a valiant job; however, there are some additional steps that can be taken to perform a more accurate import, preserving history and ensuring the transition from SVN to Git reflects a clean, formatted Git history.
First, let’s look at the author information. SVN tracks commits using a username, whereas Git has a full name and email address. You can run the following bash command in the working directory for your SVN repository to output a list of your SVN authors:
svn log -q | awk -F '|' '/^r/ {sub("^ ", "", $2); sub(" $", "", $2); print $2" = "$2" <"$2">"}' | sort -u > authors-transform.txtYou will now need to edit each author in the author-transformed.txt file to match the syntax you need for your Git author information.
For example:
ryanp = ryanp <ryanp>
Becomes:
ryanp = Ryan Pinkus <[email protected]>
Now that you have your list of authors ready, you can run the import using git svn and specify the authors-transform.txt. Copy the authors-transform.txt to a new directory C:/repo/temp and cd to that directory in the CLI.
cd c:/repo/temp

git svn clone [SVN repo URL] --no-metadata --authors-file=authors-transform.txt --stdlayout your_projectNote: If you are seeing a blank Git repository after this command completes, then you might not have a standard layout in your SVN repo. Try removing the--stdlayout flag.
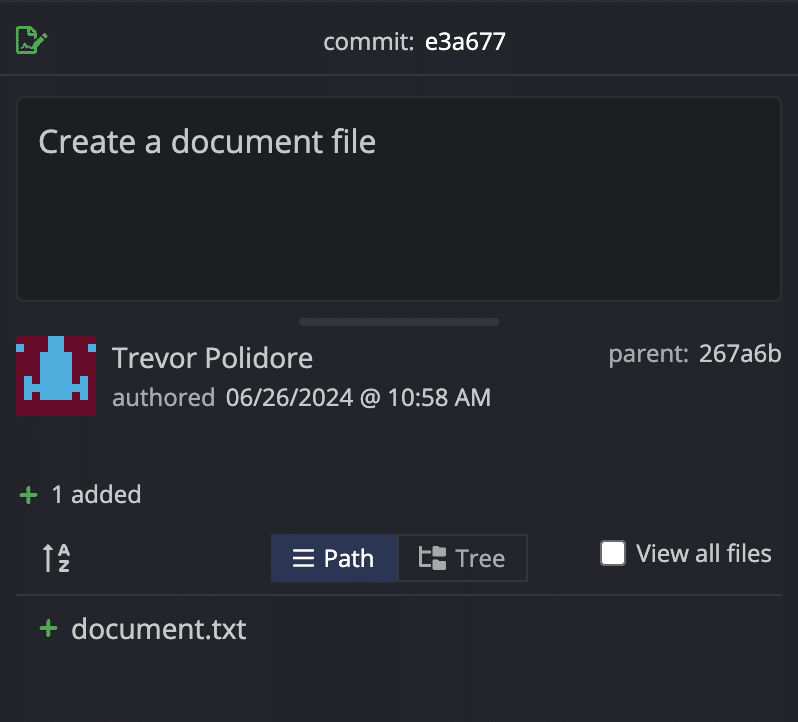
That command will clone the SVN repository to a new Git repository in the “temp” folder of your repo directory. If you open the repo in GitKraken Desktop, you will see that the commits are now in the Git format.
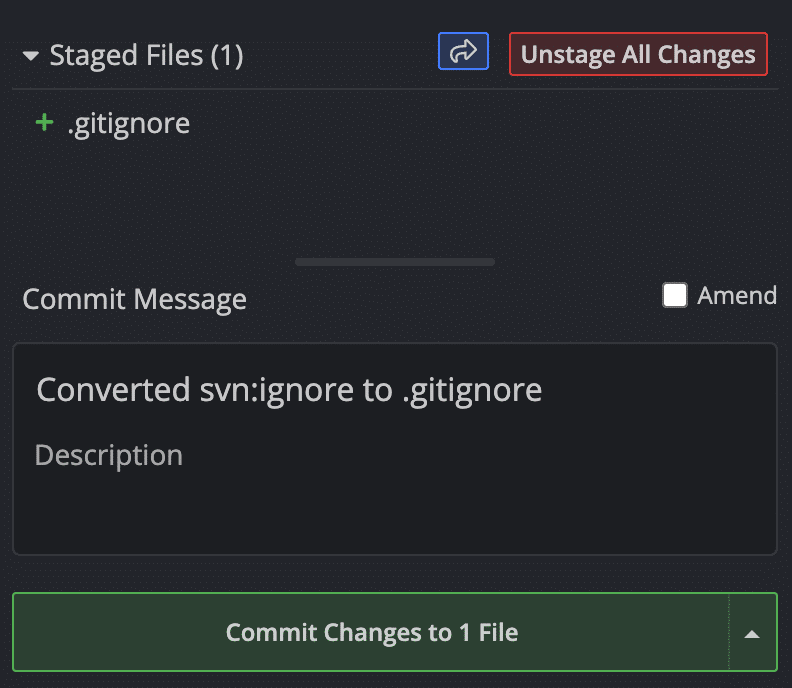
Next, you will want to address the svn:ignore file, if you were using one. You can run the following commands to convert the svn:ignore to a .gitignore file and commit it to your new Git repository.
cd c:/repo/temp/your-project

git svn show-ignore > .gitignore
You should now see the .gitignore in your WIP node in GitKraken Desktop. Go ahead and commit the new .gitignore to your repository.
Next, you’ll want to convert all of the SVN tags into the proper Git tags. You can run the following command to do so:
for t in $(git for-each-ref --format='%(refname:short)' refs/remotes/tags); do git tag ${t/tags\//} $t && git branch -D -r $t; doneYou can use GitKraken Desktop to check your graph and make sure all of your tags show up correctly.
Next, you’ll want to create local branches for each of your remote refs. You can do so with the following command:
for b in $(git for-each-ref --format='%(refname:short)' refs/remotes); do git branch $b refs/remotes/$b && git branch -D -r $b; doneOnce again, you can use GitKraken Desktop to view all of your branches and clean up any that you no longer need. If you still see a “trunk” branch, verify it’s pointing to the same commit as “master”. Learn how to set custom default branch names – like “main” instead of “master” in this GitKraken Desktop Tips article.
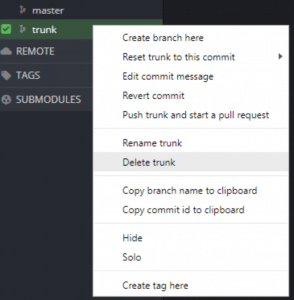
If everything looks good, you can go ahead and delete that branch, because you will now use the “master” branch, instead. Right-click the branch name in the left panel and select “Delete trunk”.
Your local repo should be ready to go at this point, so you can create your remote and push the repo up to your local repo.
Set Up Your New Git Remote
In this example, we’ll use GitHub to show you how to create a remote, but GitKraken also integrates with the hosted and self-hosted versions of GitLab, Bitbucket and Azure DevOps to make adding remote repos from any of these services quick and easy. Ok, now back to the example…
Uncheck the Clone after init option to only create the remote repo.
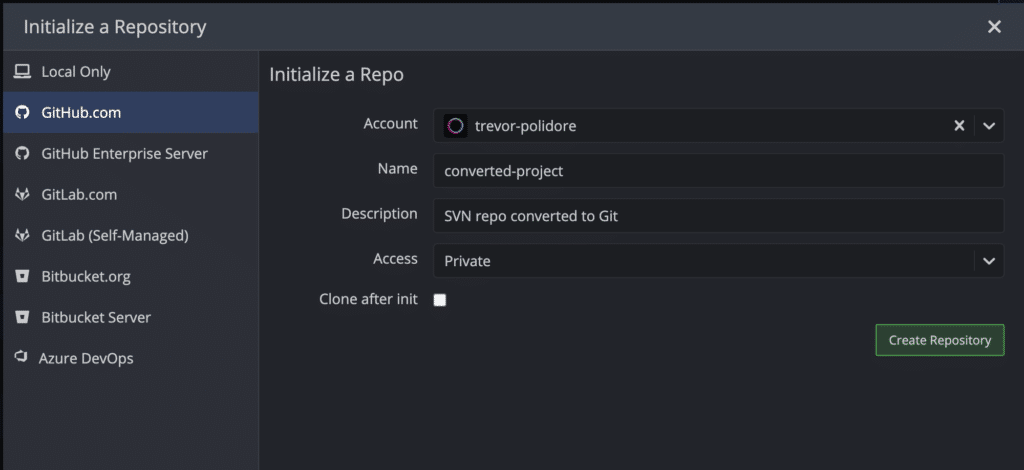
You’ll need the URL for the new remote repo, so click the View on GitHub.com button.

Copy the URL to the repo and go back to your local repo in GitKraken Desktop.
Click the + icon in the Remote section of the left panel.
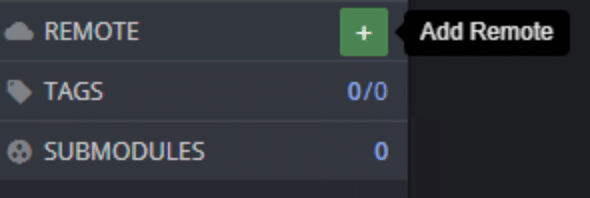
On the URL tab, name your new remote, paste the URL to the repo into the Pull and Push URL fields, and click Add Remote.

You can now right-click each branch and tag to push them up to your remote.

If you have a large number of branches or tags, then you can use the following commands to push them up to your remote.
git push origin --all
git push origin --tags
Congratulations 🎉 Your Migration to Git is Complete!
You should now have a functioning Git repo. If you’re ready to help your organization scale Git, check out our GitKraken Desktop resources, including migration tips, onboarding materials, Learn Git resources, and more!

X
Contact Us


