In part 1 of our CLI intro series: What does the CLI Stand For?, we outline why you would want to use the CLI, some of the benefits of doing so, and a bit of CLI history and terminology. In part 2 – An Introduction to Shell Commands, get ready to roll up your sleeves and dive into a deeper understanding of the terminal.
Before we go any further, take a little time to celebrate yourself. 🎉 Getting this far is further than a lot of people venture. You’re on the road to learning some awesome skills, and that, my friend, is worth acknowledging. While you might have to run some of the commands we’re going to explore several times before the concepts become clear, know that’s perfectly normal, and in fact is the same experience most people new to the Git CLI go through. Have the confidence that you will be a CLI expert in no time – because it’s true!
In this part of the series on shell commands, we will cover:
1. Shell Fundamentals
2. Moving Around the File System with Shell Commands
3. Interacting with Files and the Filesystem with Shell Commands
4. Reading the Manual
5. A Short List of Handy Shell Commands
Let’s get into it.
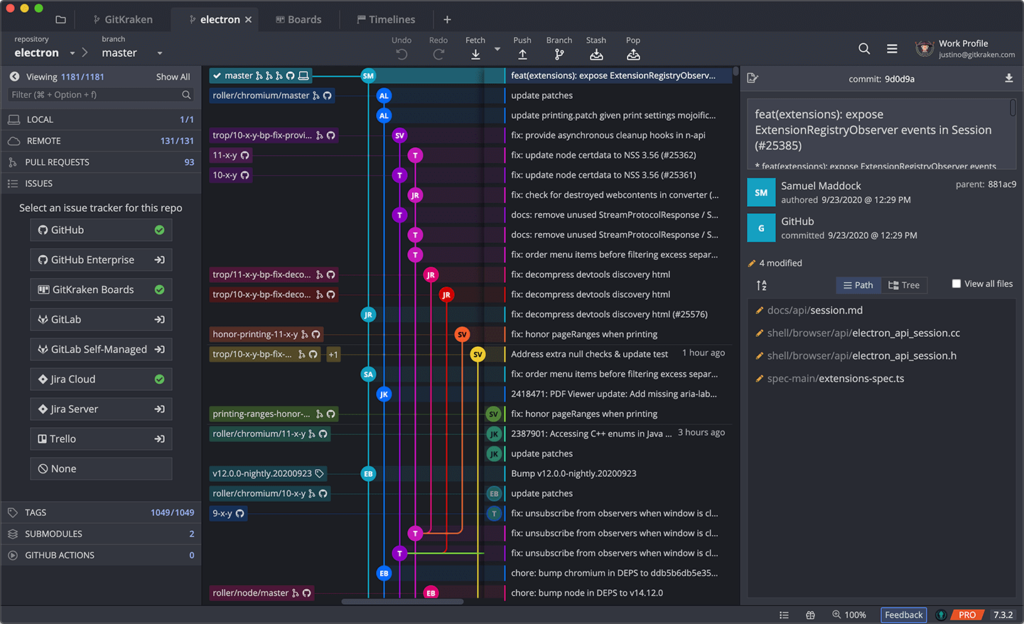
Learning Git basics from the command line? GitKraken Client offers helpful autocomplete suggestions for file paths and common commands.
Shell Command Fundamentals
Who Does the Shell Think I Am?
When interacting with a command line shell, it’s important to define “who” is interacting with the shell. It might be obvious to you that you are interacting with the shell, but every system out there has the notion of user roles and root, or admin, roles. Those different roles have different permissions, and each role can affect the system differently. Anything you do as a user is going to be limited to your account, whereas acting as root can affect the whole machine and all accounts. Be careful with root access.
To see who the computer thinks you are, use:$ whoami

Here, we can see the username dwaynemcdaniel returned when asked whoami. This becomes important later on when you look at permissions and installing programs. For now, just be sure you are logged in as your username and not root.
Navigating Your File System
In a command line environment, actions are performed relative to the folder you’re working in. Knowing where you are in the operating system’s folder structure is very important. Where you’re working is called your “present working directory.”
To see where you are in the operating system’s file structure using the CLI, use the following command:
$ pwd

The pwd command returns the absolute, or full, path of the current working directory using the format /User/username/foldername. This full path can be read from left to right: the root directory location of /; next is the Users directory that keeps track of all the users on a system; followed by the user’s profile directory; finally, the rest of the path is to specify folders in that user’s file system. Knowing the full path and how to access it is very helpful in moving or copying files, installing programs, or cloning repositories.
A Note About the Prompt
At this point, you might be wondering about the text that appears before pwd in the above example. That info is called the shell’s “command prompt variables.” By default, they tell you who is logged in and the name of the machine.
The % just indicates where you should begin typing. Examples of commands often start with a $ or a % to inform you where the actual command starts. In this article, we will use $.
Your prompt can look a bit different than the one in these examples, which is expected. You have complete control over what is printed before that prompt. Later in this series, we will look at customization, including modifying those command prompt variables and making your own shortcuts. For now, just know that no matter what your command prompt looks like, the example commands in this article all begin after the $.
List a Directory’s Contents with CLI Shell Commands
Knowing where you are is a good start, but you need a way to see what is in the present working directory.
To list the contents of the present working directory, use the following shell command:
$ ls

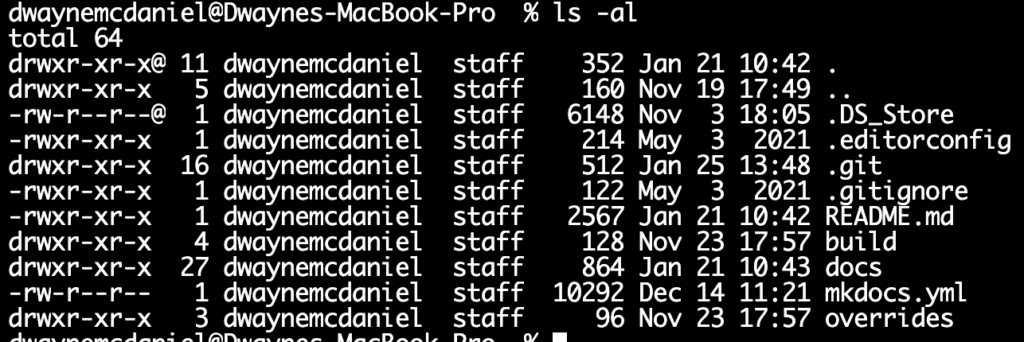
This is the equivalent of opening the folder with Mac’s Finder or Window’s File Explorer. It just shows the name of the visible folders. Folders or directories typically lack file extensions at the end of their names and files, but not always. In this example, you can see that docs, build, and overrides do not have file extensions, which means you are correct to assume they are all directories. You can also see that README.md and mkdocs.yml both have file extensions and are indeed both files.
See All Folder Contents using Shell Commands
To see all the contents of a folder, including hidden folders and files, use the following shell command:
$ ls -a

Using the option -a means “List all the directory contents including the hidden folders and files.” Hidden folder and file names start with a period, .. For example, one of the hidden folders is the .git folder and one of the hidden files is .gitignore. The -a option reveals everything including hidden files and folders.
Special Hidden Characters
The items . and .. are actually very handy special characters that are always present in every directory in the file system. The ., pronounced “dot,” means “this current directory” and the .. or “dot dot” means “one directory level higher.”
See All Folder Contents With More Detail
There are a lot of variations on how you can display what information the ls command shows through the use of options. To see more information about the contents of the present working directory, use the following shell command:$ ls -l

That’s a lot of information! Let’s break it down and look at each part.
The -l flag stands for the “Long Format Option.” This is more information than you commonly need to do your work, but it’s helpful to be able to get this information when you need it. Let’s move on for now, but the point is that there are many more options for how to list the contents of a directory in the CLI to best suit your needs.
Combining Options for CLI Shell Commands
One last note before moving ahead to other CLI shell commands: you can combine any of the options, sometimes called flags. This is true for any shell commands that have options.
To see more information about all the files in a directory, use the following shell command:
$ ls -al

Moving Around the File System with Shell Commands
To work in other directories, you will need to move your point of reference for where you are in the system.
To change your present working directory, use the following shell command:
$ cd <target-directory>
Here’s an example of moving down a directory level, into the build folder:

You can move to any directory in the file system by specifying the full path in the shell command. For example, the full path for the Applications folder on macOS is /Applications. No matter where you on in the file system, if you’re using macOS, you can change to the Applications directory using the following shell command:$ cd /Applications

Navigating the file system means remembering the path to other directories. The CLI in GitKraken Client can help by autosuggesting available folders!
Moving Up a Directory
Remember that “dot dot” .., from earlier when we ran ls -a? Those dots are pretty handy for moving back up a level in the file system.
To move up one directory higher in the file system, use the following shell command:$ cd ..

Moving Up Multiple Directory Levels
Since every folder contains the .., you can always invoke this flag to move one level higher than any directory, even if you don’t know the name of the higher directory.
To move up 2 directory levels, use the following shell command:
$ cd ../..
To move up 3 directory levels, use the following shell command:$ cd ../../..

Change to Last Directory
If you have ever used a television remote control, then you might be familiar with the “last channel” button, which changes the channel back to the previous channel. CLI shells have this option as well with the - symbol.
To change directory back to the previous one, use the following shell command:$ cd -

Change Relative to Home
The ~ symbol has a very special meaning inside a CLI shell; it is a shorthand for the path to your home folder. Rather than having to specify a folder path from /, the root of your entire OS, you can use ~ to start a path from your /username folder, which is referred to as your Home folder. You will see this shorthand notation a lot in online examples and it saves a great deal of typing overall.
To change directory into your /Users/username/Documents/ folder, use the following shell command:
cd ~/Documents

Interacting with Files and the Filesystem with Shell Commands
Moving around the file structure and being able to look around is one of the main goals of any shell. Another major goal of working with a shell is having the ability to manipulate the file system and interact with files. This includes creating, moving, renaming, updating and removing files.
Making New Directories
To make a new directory or folder, use the following shell command:$ mkdir <newfoldername>

Running mkdir will, by default, make the new folder inside the current working directory. However, you can specify any location on the system by providing the path to where you want it created.
To make a new directory inside a subdirectory, use the following shell command:
$ mkdir path/to/target/location/newdirectoryname

Making New Files
There are a number of ways to create new files. You can use a text editor to open and save a new file, which we will talk about in the next part of this series, or use your GUI to create one. But one of the fastest ways to make a new blank file is to use the touch command.
To create a new blank file, use the following shell command:
$ touch f<ile-name.extention>

You are not limited to just the .txt extension. You can add any filename extension you desire here, like .js, .php, .sh, or even .jpg or .mp4. To the shell, these are all still editable text files. Other programs will use the file extension to determine how to handle the contents of the file and what should open them.
Moving Files
To move a file to a new location in the file system, use the following shell command:
$ mv file newfile-location

You can also move files that are not in the same directory as your present working directory, but you will need to specify the path to it.

In the above example, you will see that instead of specifying a path to a folder, the special character . was used. Dot just means “my current location.” But since the file we wanted to move was in another directory, we used the relative path to where we were in the file system. Giving the full path would have also worked, but it’s much more common to just use relative paths.
You can also move entire directories using the shell command: mv, as shown below.

Using `mv` to Rename Things
To rename a file with the mv shell command, use the following:
$ mv filename newfilename

This might not seem like an obvious use case at first, but if you step back and think about how a computer would move a file from point A to point B, it actually makes a lot of sense. Unlike moving physical items around a house, the operating system doesn’t pick them up and carry them over, it simply changes how the items are referenced. It’s just as easy to change the name of a reference as it is to change the location.
Copying Files Using Shell Commands
To make a copy of a file, use the following shell command:$ cp filename newfilename

Just as with moving files, you can copy files from any path to any path, as long as you specify where they are.
Copying Directories Using Shell Commands
Unlike moving files and directories, the shell does not allow you to copy entire directories by default. If you try, you will get an error of cp: foldername is a directory (not copied). Luckily, there is an option we can use to override this safely.
To copy a directory, use the following shell command:$ cp -r foldername newfoldername

In the above example, the -r stands for recursive.
Removing Files Using Shell Commands
To remove a file, use the following shell command:
$ rm -i filename

There are a couple of things to note here. In the above example, you will see a confirmation step: remove text1.txt?where the user had to enter yes to continue. This is called operating in interactive mode, triggered by using the -i flag. It is a really good idea, especially when first learning to use the command line to use the interactive mode of rm every time you run it just to make very sure you are removing what you intend to remove.
To delete a file without double checking, use the following shell command:$ rm filename
Also of note is where the file went. Unlike your desktop GUI that moves things to a trash folder, the CLI shell simply deletes them from the file system. There is no way to get those files back. This is one of the more ‘dangerous’ parts about using the terminal to type shell commands and another good reason to Git commit early and often when using version control.
Removing Directories with Shell Commands
Removing an entire directory needs a little more than just rm. Just like with the cp shell command, you need to specify the -r flag. And if you are very, very sure you want to delete a directory, you can skip interactive mode and force through the deletion with the force option: -f. Be careful though, there is no undo from this command. Once the files are deleted, they are gone forever if not backed up with version control.
To force remove a directory, use the following shell command:rm -rf directoryname

A note of caution: This is an extremely powerful command and you should exercise great care whenever you use the force option of -f. There are safety rails for a reason, and it’s always advised to avoid overriding them if another way forward is available.
As the list of commands you need to learn grows over time, GitKraken Client’s CLI can simplify finding the right ones! And it will help you visually track your Git project.
Reading the Manual
Earlier in this article, you were introduced to some options, or flags, which were needed to perform specific feats with the ls, cp, and rm commands. This is where a lot of people start to worry about memorizing a long list of possible options. Don’t panic! Aside from memorizing a handful of handy flags, most users, like the author of this series, need to look up options when doing more complex things. And one of the best parts about a CLI shell is that the documentation is built right in!
To access the manual for any shell command, use the following:
$ man command
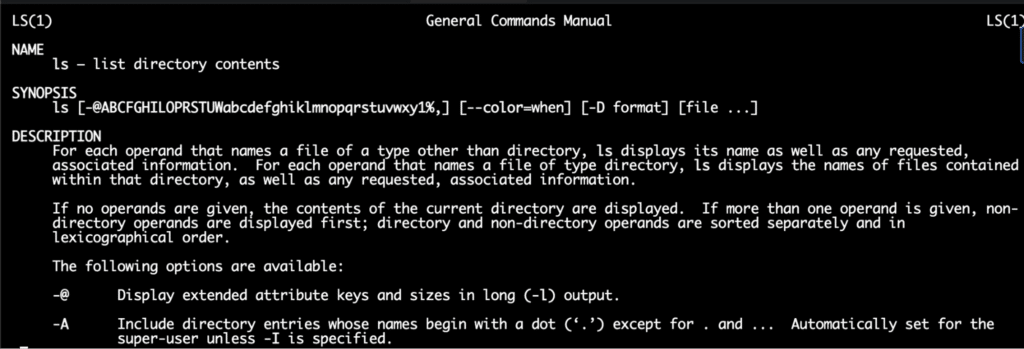
For example, here is the output from $ man ls

Every built-in shell command has an entry like this. It even works when your computer is completely offline. While it might sound like some dry reading, it can actually be a very satisfying way to learn what all the options are and which ones might come in handy one day. The deeper you go into specific use cases, man will become an incredibly helpful ally.
A Short List of Handy Shell Commands
Now that you know the basics of navigating the file system and creating, moving, and deleting files and directories, you can start confidently exploring the other commands built into your CLI shell. There are far more shell commands than we have time to discuss here, but let’s touch on a few favorites that are very useful.
Useful Shell Commands:$ clear – this simply clears the terminal’s screen.$ reset – restarts the terminal session, clearing the screen in the process.$ history – this shows the list of commands you have recently run.$ ps – show what processes are running.
$ cat filename – Concatenate the contents of a file to the screen. Basically, this will print out the file contents for you. Some commands have weirder names than others.$ head – Print out the top 10 lines of a file in the terminal window. You can specify how many lines you want to print by using the -n command followed by the number of lines you want to see. For example head -n 50 file.txt will print the first 50 lines of file.txt to the screen.
$ tail – Print out the last 10 lines of a file. Like head, you can specify the number of lines to show, but tail also has a very useful follow option: -f. When this option is in use, the terminal will continually print the bottom lines of a file as it’s updated. This is exceptionally helpful when watching log files.
Keyboard Tips for Shell Commands
Before we close out this section, here are a few useful keyboard tricks every CLI shell user should know. Note: ctl means the control key on the keyboard.
ctl+r : “reverse-i-search” in Bash or “bck-i-search” in Zsh. This hotkey option will let you type partial commands and re-execute them without needing to completely retype them. This is very handy for very complex commands with a lot of options.
ctl+c : End the current thing being executed. If you ever execute something and want to stop or abandon that action, this keyboard combination is your best friend.
The up arrow : Pressing the up arrow 🔼 populates the command prompt with the previous command. Push up again and it cycles through your entire history. This can save a lot of typing.
tab : Pressing the tab key after typing part of a command, filename, or directory path will tell the shell to attempt to autocomplete what you’re typing. Imagine you have a folder containing index.html. Instead of typing out index.html you could type in and hit the tab key. The system assumes you want to autocomplete the line with index.html and fills it in. GitKraken Client actually offers the same functionality as well as automatically suggesting the autocomplete options as you type!
Mastery of the Command Line Takes Practice
Great job making it this far! You are well on your way to being a command line wizard! But mastering this skill, like so many things in life, requires more than reading the theory and trying out the commands once or twice. It takes practice and persistence. But never fear – you don’t need to do this without help! The GitKraken CLI is an amazing way to dive into the terminal thanks to the auto-complete suggestions to help you explore shell commands and options.
In the next section, we will dive into tools you can use through the CLI, including Git, and how to get and install many more!
GitKraken Client was designed to help developers stay focused on what matters, not memorizing command parameters and usage. It’s the best tool for managing your Git projects and unlocks the full power of the command line!
 GitKraken MCP
 GitKraken Insights
 Dev Team Automations
 AI & Security Controls


