Let’s start by talking about meetings. Meetings are infamously inefficient. They chop up your day and interrupt you from your work. Worst of all, meetings are often spent doing the wrong thing: going over project status.
The common complaint of Jira, and frankly many productivity and collaboration tools, goes something like:
“If I’m spending time updating Jira, why do we need to have so many status meetings?”
Great question.
If you’re doing status meetings, you’re doing it wrong. Meetings are for wrestling with sticky problems and discussions, not for updating teams on progress. That is what Jira is for.
But oftentimes, Jira isn’t up-to-date if progress isn’t captured in the related Jira issue. This often means the project manager will need to jump on Slack or leave a comment on the issue. Worst case, they will call a status meeting.
No one wants to have more meetings. The trouble is, we’re having more meetings than ever, and it’s only gotten worse since the pandemic. The sudden shift to remote work is leaving people feeling overwhelmed; people report spending more time in meetings and more time coordinating with each other, and say they are now spending more time reporting to clients and managers.

Collaborating efficiently has never been more important. The holy grail of productivity is to have fewer meetings and fewer interruptions. One part of the solution for developers is automating as much of the Jira status updates as possible using steps developers are already taking, such as daily actions in Git.
What is Jira?
Atlassian’s Jira is a juggernaut of project management software. Atlassian products are used by 83% of the Fortune 500 companies, with over 100,000 businesses using it today, and adoption growing 30% annually. Jira is everywhere; if you haven’t used it before, you likely will at some point.
About half of Jira users are using it for software development projects, but half of them are non-technical users. Everyone on the team is using Jira to get their jobs done. Teams use Jira because it’s flexible and is well known for good coordination between various groups.
Driving Jira with Git
For a quick orientation of Jira, the Jira issue is the atomic bit of organized work inside of Jira. Every Jira issue belongs in the Jira project, and each project has a key. As Jira issues are created, they’re given a number; a combination of the project key and the issue number is the Jira issue key.

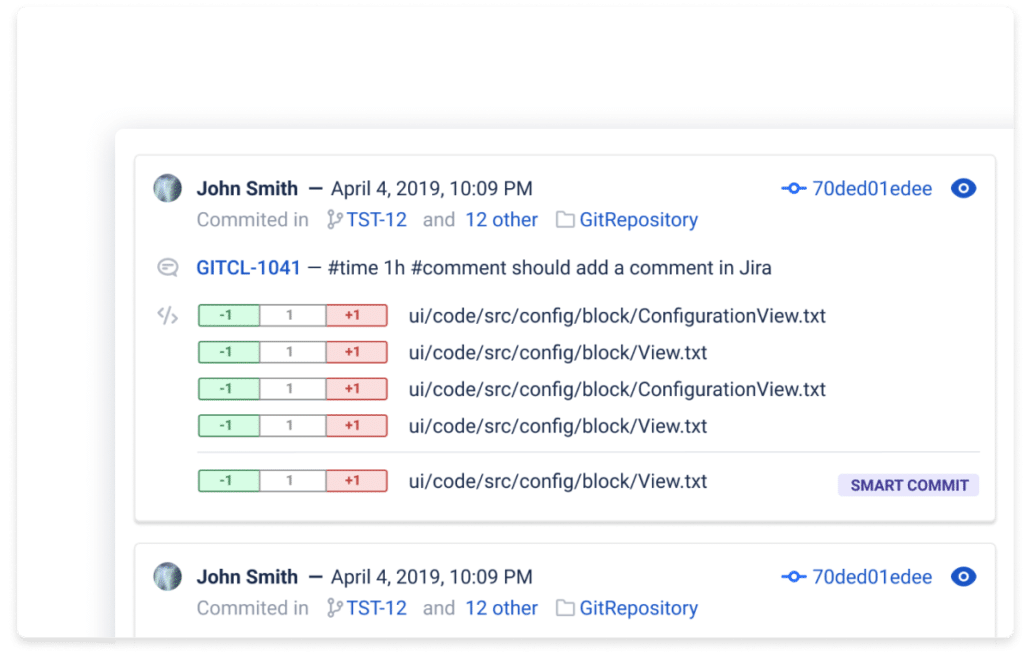
Jira issue keys are how the Git Integration for Jira tool can associate Git commits, Git branches, and Git pull requests with a Jira issue. When viewed in Jira, the commit shows in the context of the issue.
Back to the problem at hand: can you just update Jira? Can’t developers just jump over to Jira and update status, add a comment, or update a custom field here and there? Well, developers often feel like too much process has been added to Jira, and that taking the time to update Jira isn’t part of their job.
But more importantly, developers working in Git, perhaps rightfully, feel that their changes in Git contain the status updates that everyone is looking for. While on the other hand, customers, managers, leadership, and others who care about the progress of development projects want to look at Jira and quickly get a sense of where their projects stand compared to the plan and if there are any new risks. Oftentimes, they’re reviewing progress in Jira at a high level, so it’s critical that the structured status data that Jira provides is up-to-date.
So what’s the middle ground between developers and leadership?
Learn how you can make your Git + Jira experience more efficient and enjoyable with Git Integration for Jira
Automated Jira Updates with Git
Let’s talk about updating Jira automatically. Why would you automate Jira using Git? Because, automation can lead to three things that can drastically improve productivity:
- Flow
- Consistency
- Time
Flow
Flow is the state where motivation, clarity, focus, and knowledge magically align. It’s where we are at our most productive. But, it can be a fleeting state, and it usually doesn’t take much to knock us out of our flow.
Based on an analysis of 10,000 recorded programming sessions and a survey of 414 developers, a research project by Georgia Tech found that a developer takes 10-15 minutes to start editing code after resuming work from an interruption. When interrupted during an edit of a method, a developer resumed work in less than a minute only 10% of the time. The study also found that a developer is likely to get just one uninterrupted 2-hour session in a complete workday.
Meetings, Slack notifications, and so many other things are going to interrupt a developer’s flow. Developers often curate their IDE build tools, Git workflows, and other tools to provide the most ergonomic setup for their productivity. Ideally, this setup increases flow by reducing context switching. Jira often remains elusive as a tool that can be personalized to increase flow. One way to increase flow is to automate.
Consistency
Jira is often disparaged as a tool for micromanagement and too much process, but teams without any process lack consistency. This makes it hard to onboard new developers, and increases the risk of mistakes, additional work, and failure to meet requirements like security and performance.
Building consistency is building that trust within a team that they’re working together towards the same objective. A significant way to build trust within a team is to consistently update Jira, but you need to build consistency without creating a heavy process. Heavy processes require many steps, lots of switching, and team members must keep the process in their heads.
The key to building consistency is automation.
Time
While you can’t actually create new time, you can avoid time wasted updating other people on your team, and can spend your time more effectively.
An important reason why automating updates to Jira saves time is because it is an asynchronous process; you’re updating it as you work. The reason status meetings are so terrible for productivity is that, by nature, a meeting is a synchronous process. Everyone who is participating has to be participating at the same time. These meetings are interruptions and they break flow.
If Jira is already updated, team members can simply check the status on their own time. As teams’ development workflows are automated, you will get time back. If automation saves you from switching over to Jira, you save one minute; but if automating updates to Jira means that you can eliminate calls or meetings, you may have also just saved yourself an hour, and across a whole year, that’s a lot of time.
Automating Jira with Git Integration for Jira & Gitkraken
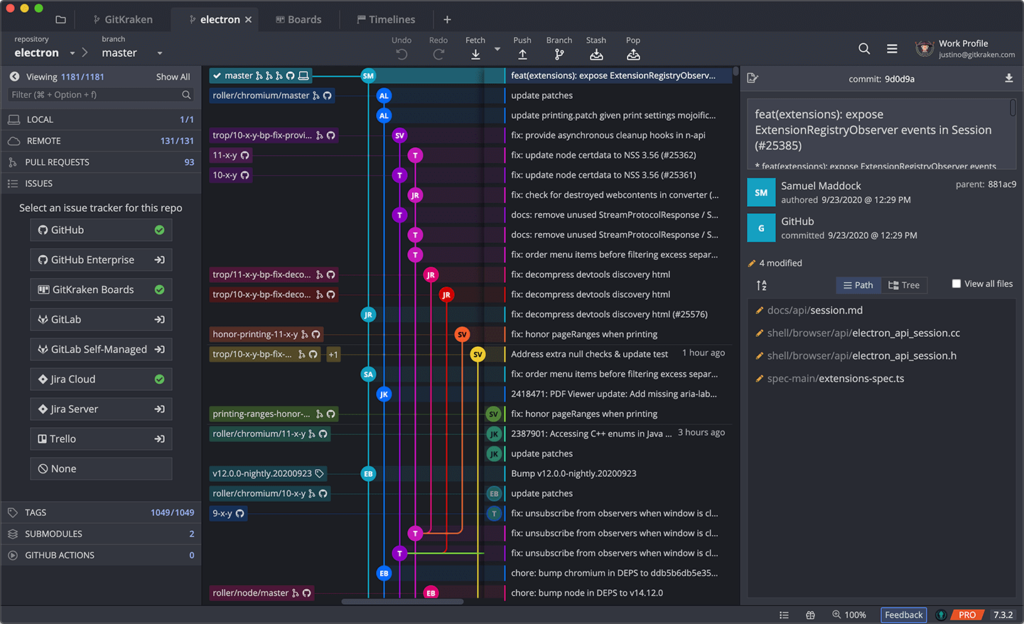
Now let’s look into how we can automate Jira using the GitKraken Git client to make the edits and Git Integration for Jira to create branches and view commits in Jira.
First, let’s review smart commits. Smart commits are a syntax that you use in a Git commit message to instruct Jira to do something. You can record the time spent on an issue, add a comment to the issue, and transition the issue status in Jira using the transition name. For example, you can move an issue from In Progress to Resolved.
#Time
#Comment
#[Transition]
A large benefit of smart commits is that they are simple and can be used almost universally in Jira, requiring no setup. The downsides are that there’s limited actions you can take, and you need to remember the syntax and the issue transition names.
Here is an example of a smart commit message using all three commands:
ABC-123
#comment resolving bug found by Sarah
#time 1h
#resolve
Using Smart Commits to Drive Jira with Git
To get started, the first thing you’re going to do is create a branch in Jira. You should notice that Jira automatically brings up an issue key, which is important for associating the branch, and by default, Jira also adds the summary.
After you have created the branch, you should notice a GitKraken icon next to the branch on the right side of the UI. Click on the icon to open the related repository in GitKraken and checkout the Git branch.
From here, you can make any edits you wish, stage the file, and add the commit message. Because this is a smart commit, the first thing you’re going to do is add that Jira issue key; this is what’s going to associate the commit with the Jira issue. You will also want to add some of the smart commit syntax, how long it took you, and mark the status.
Next, commit your changes and push to your remote repository. If you look back in Jira, you should now see evidence of that smart commit. You should look at the commit message to see that the commit has been associated correctly.

Watch this video clip to see a step-by-step demo on how to create a smart commit with Git Integration for Jira and GitKraken.
Test this workflow for yourself using two of GitKraken’s legendary productivity tools: the Git client and Git Integration for Jira. ⬇️
Automation for Jira
Automation for Jira is an application bundled in Jira Cloud and offered as a separate app on your data center and server. Depending on your Jira permissions, you should have access to create and update your automation rules.
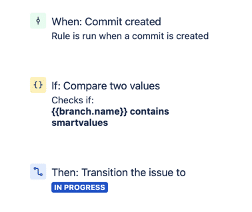
Triggers are what gets a rule started. Conditions and branching allow you to put some limits on rules, and actions are what you choose to do with the triggers. You can even add multiple actions to a single rule.

Automation for Jira supports commits, branches, and pull requests for triggering automation rules. A big difference between automation for Jira and smart commits is the number of actions you can configure. There are upwards of 30 different actions, like transitioning an issue, sending a web request or Slack message, or even sending an email.
Automation for Jira rules are extremely powerful. You configure them once, and there are many actions you can take to chain them together. Once configured, developers don’t have to remember what state the Jira issue is in, or what the transition syntax is; they just need to remember to add the Jira issue key.
It’s important to keep in mind: automation for Jira does require setup, and depending on how thorough you want the workflows, this can take some time. Again, an important benefit of automation for Jira is that it doesn’t require any special syntax and commit messages other than including the Jira issue key.
Setting Up an Automation Rule in Jira
First, you will start by going into Project Settings in Jira → Automation. You will be directed to the library of automation rules. From here, you can click the button in the top right corner Create rule to begin the process of creating a new automation rule in Jira.
Watch this video clip to see a step-by-step demo on how to set up an automation rule in Jira.
If you really want to tap into the power of automation for Jira, smart values allow you to condition an automation rule to run after checking specific fields. For example, you could run a rule if a pull request is submitted related to the develop branch.
Automation with Git Integration for Jira
If your commits, branches, and pull requests aren’t in Jira yet, connect them to Jira for a quick win and build on it. When your team is updating Jira automatically using Git, you will find greater capacity for flow, consistency, and you will reclaim your time. And, you can avoid being asked to update Jira. 💯
Stop context switching and spend less time updating Jira.
About Adam Wride, Co-Founder of BigBrassBand
Adam Wride co-founded BigBrassBand back in 2009, and in 2012, the company released the first version of the Git Integration for Jira tool on the Atlassian Marketplace. He is now the General Manager of Planning Solutions at GitKraken working to build a suite of Git-based productivity tools.
 GitKraken MCP
 GitKraken Insights
 Dev Team Automations
 AI & Security Controls