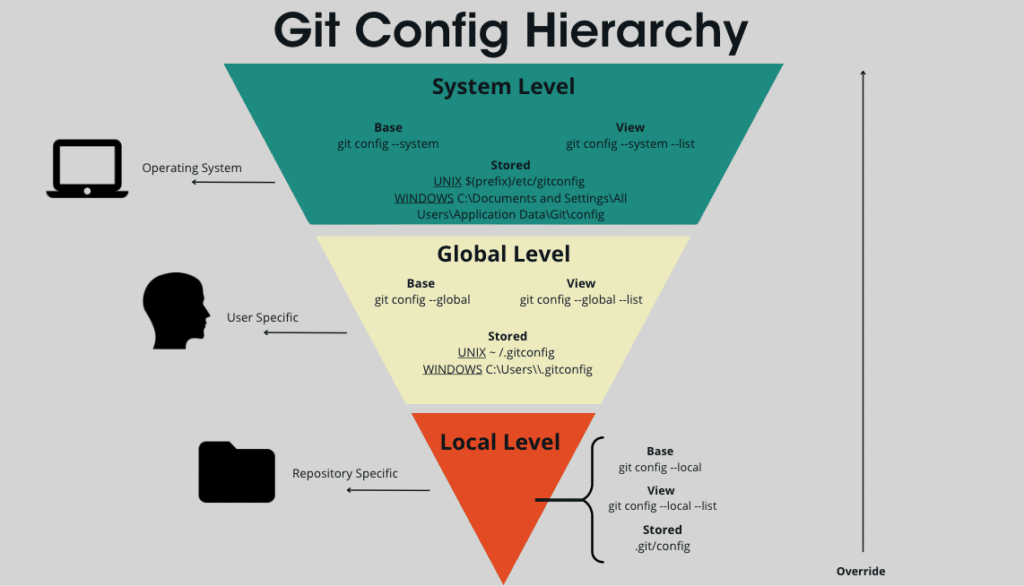
Git config is a powerful Git command that allows you to customize how Git works and optimize it to fit your workflow. As shown below, Git pulls configuration settings from a narrowing list of files. Each configuration level in the graphic below can overwrite the configuration settings in the level above it. For instance, Git config global settings overwrite Git config system settings, but not Git config local settings.

After downloading Git, most developers immediately run Git config commands to set their username and email. After that, there are thousands of ways you can configure Git to fit specific use cases and workflows.
In order to keep things simple and informative, we’ll explain the most common Git config levels including Git config system, global, and local, as well as how to configure your username and email in the command line and GitKraken Client.
Table of contents
- Git Config System
- Git Config Global
- Git Config Local
- Git Config Username in the CLI
- Git Config Email in the CLI
- Show Git Config in the CLI
- Git Config with GitKraken Client
With GitKraken Client, you can skip ahead and start leveraging the power of Git without having to download or configure it.
Git Config System
The Git config system level is the broadest configuration level and contains configuration information for your entire computer. Because Git config system configurations are specific to a computer’s operating system, most developers tend to keep the default configuration settings for this level.
To view a comprehensive list of your Git config system settings in the terminal, run:
git config –system –list
Git Config Global
Git config global configurations are applied to you as a user, stored in your home directory, and can overwrite Git config system settings. Unlike system configurations, developers regularly customize Git config global settings to fit their workflows. Some common Git config global configurations can be used to set your username, email address, default editor, commit message template, terminal colors, autocorrect, and more.
To view a comprehensive list of your Git config global settings in the terminal, run:
git config –global –list
Git Config Local
The Git config local level includes settings that are Git repository specific and overwrite Git configurations on the global and system level. Developers frequently use Git config local commands to update the username and email associated with their work depending on what type of repository they’re working on.
We’ll use Keif, GitKraken’s adorable Kraken mascot, to demonstrate this process. Let’s say Keif’s global configuration uses their work email: [email protected]. This means all of Keif’s Git commits are associated with the [email protected] email unless they run Git config local commands to change the associated email for a specific Git repository.
Now let’s assume that Keif has finished up their work for the day and now they want to contribute to their favorite open source project, GitLens. Keif doesn’t want their work email associated with their commits in this project, and instead would prefer to use their personal email: [email protected]. To make sure their contributions to the GitLens repo are associated with the [email protected] email, Keif can simply run the following:
git config --local user.email [email protected]
Now Keif’s contributions to the GitLens repository will be associated with their preferred personal email rather than their work email. Keep in mind, with this process, Keif won’t have to run any Git config commands when they go back to work, as they have only updated their local configuration for the GitLens repository.
To view a comprehensive list of your Git config local settings, run:
git config –local –list
Git Config Username in the Command Line
Now that you have a general understanding of the different Git config levels, let’s take a look at how you can use Git config commands to set your username and email. Git requires that a username and email be established before you can leverage all of its capabilities, so it’s a good idea to get this out of the way immediately after you download Git.
To use Git config username to set your username, navigate to a terminal and run:
git config --global user.name "Your Name"
Git Config Email in the Command Line
To use Git config email to set your email in the terminal, run:
git config --global user.email [email protected]
It’s important to note that because the global level configuration was used, Git will use the username and email you set for each subsequent Git repository you create unless you perform a local configuration to override it on a repo by repo basis.
Git Config your Default Branch Name to Main
In 2020 GitHub, other hosting services, and the development community at large collaborated to change the default or initial branch name from master to main. This reflects a socially conscious shift to terminology that’s more inclusive. Read more about the change from master to main.
To change your default branch name from master to main, run the following command in the terminal:
git config --global init.defaultBranch main
Now, whenever you initialize a new Git repository, the first branch created will be called main.
Show Git Config in the Command Line
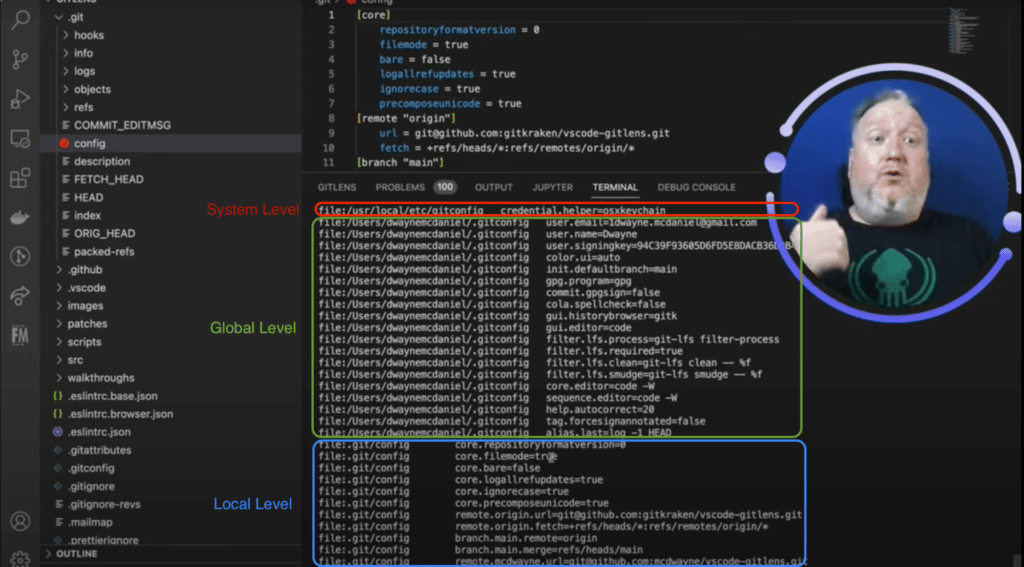
You can view all of your Git config settings by running the show Git config command in the terminal:
Git config –list –show-origin.
The terminal will return your Git config settings in the same hierarchical order we covered previously, starting with the system level and narrowing to global and local.

Git Config with GitKraken Client
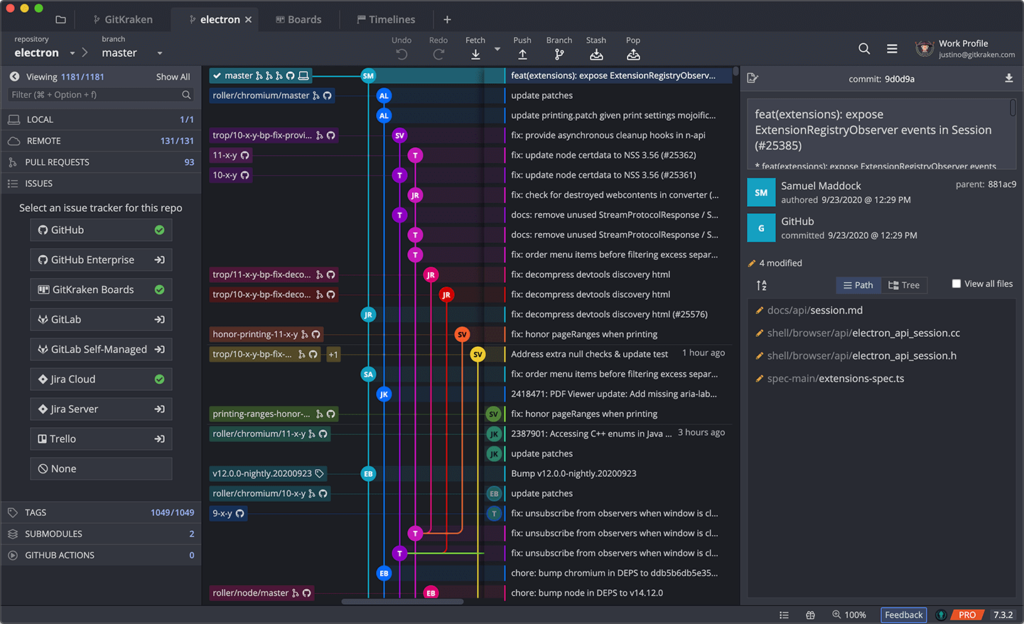
With GitKraken Client, you can start using Git and all of its capabilities without running a single Git config command. In fact, if you’re using GitKraken Client, you don’t have to download Git on your machine at all. In order to customize your username and email in GitKraken Client without running Git config commands, follow these steps:
- Select the gear icon ⚙️ in the top right to access your Preferences
- From the left panel, click Profiles
- Select the three ellipses next to your name in the Profiles section and click Edit Profile from the dropdown menu
- From here you can update your Author Name and Author Email
You can access further customization and configuration settings by updating the options in the left panel of GitKraken Client’s Preferences.
Git Config-gy with it
We’ve covered the basic hierarchy of the Git config command and shown a few examples of how developers use this command to customize Git. If you want to delve deeper into the more advanced Git config options, visit the official Git config documentation. As you become more familiar with Git, you’ll encounter more unique ways you can configure it to fit your development needs. GitKraken Client supports your unique Git configurations, but also allows you to leverage Git without having to configure it at all, saving you time and mental energy. Try GitKraken Client for free and take your Git skills to the next level.


