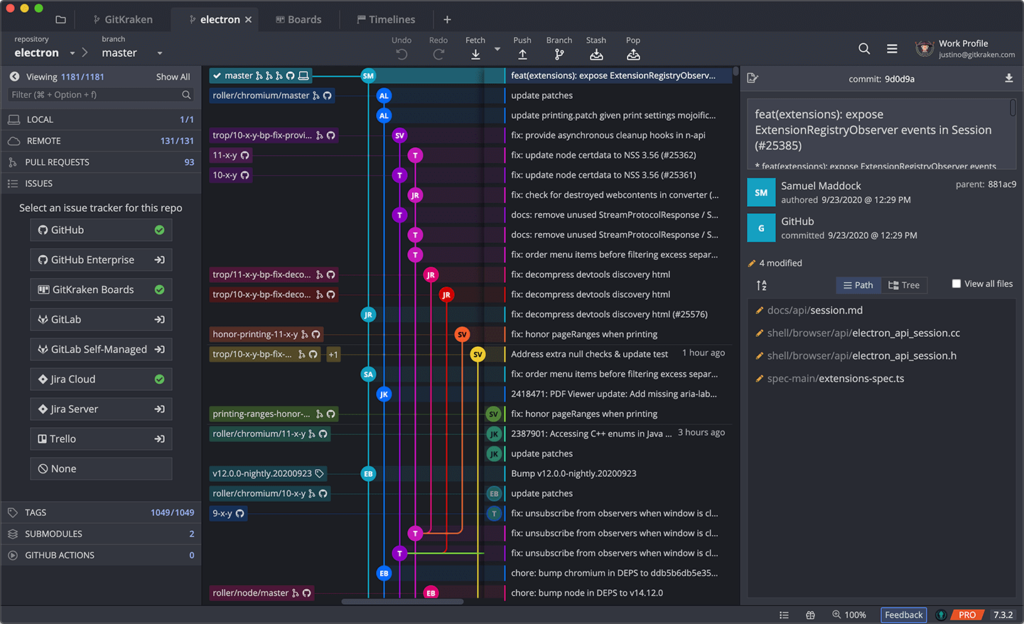
One of the reasons Git has become so popular is because it enables teams of any size to collaborate on code. When working with Git, users can Git push changes to a shared copy of their local repository, called a Git remote. New collaborators can pull down these collective changes– the sum of all related Git commits–when they perform a Git clone, but what if someone only wanted to pull down selected changes?
If someone has already cloned a remote but wants to get new changes that others have committed and incorporate those changes into their local repos, they can perform a Git fetch. In this article, we will review the Git fetch command in detail and go over how to perform the action in the command line and GitKraken Client
- What is Git Fetch
- Git Fetch Remote Branch
- Solution to Common Error Message
- Git Fetch in the Command Line
- Git Fetch with GitKraken Client
“@GitKraken
makes my life so much easier! Switching between branches, squashing commits, good overview of changes in code and much more. 👌” – @@mjovanc
What is Git Fetch?
Git fetch is a command in Git that performs two different tasks. First, Git fetch downloads all of the commits from a specific remote branch, updating the remote tracking branch locally. At the same time, Git updates a special file called FETCH_HEAD that keeps track of where the downloaded updates came from and what commit SHAs are involved.
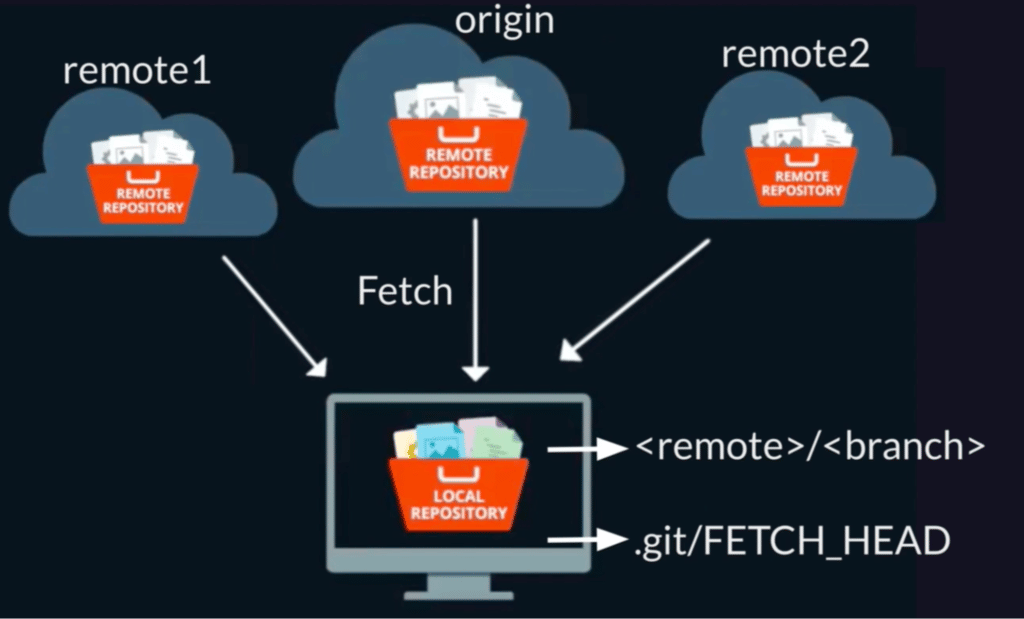
Remote Tracking Branch
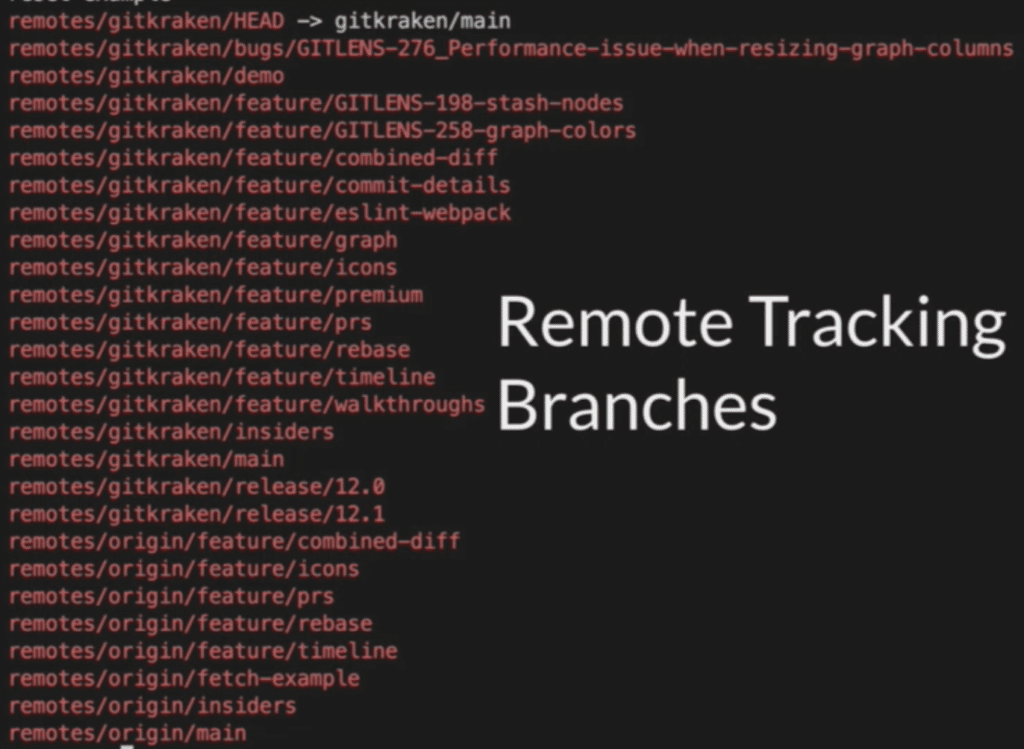
Git tracks how far out of sync a local Git branch is from any remote repository through remote tracking branches. Git counts the number of commits ahead or behind that a local repo is from the remote repo based on the contents of the remote tracking branch. Being ahead means there are changes in your local branch that do not exist on the remote. On the other hand, being behind means there are changes on the remote that do not yet exist on the corresponding local branch.
You can see all the remote tracking branches for a repository by performing the following command:git branch -a
Git is built to work asynchronously, meaning everyone works on a complete copy of the repo on their local machine. Unlike SVN or other version control systems, with Git, there is no central true repository to connect with. Git doesn’t stay connected over the Internet to remote repos and assumes you will manually download the commits from remote servers. At the same time, Git needs to allow a way for you to review those changes in case you don’t want to apply them locally. This is the very nature of Git fetch.
When you perform a Git fetch, all the commits on the remote branch are downloaded to the remote tracking branch first, allowing you to view the contents of the commits before applying the changes to your local branch. You can do this in a couple of different ways.
The first way to view an example of the changes downloaded locally is to Git checkout the remote tracking branch. This will put you in a detached HEAD state, meaning HEAD is not pointed at the end of a local branch. You can see all changes, copy code, or create a new Git branch, all without affecting the local branch.
Another option that will quickly show you what has been changed is running a Git diff, which compares the local branch with the remote tracking branch after you perform a Git fetch. We will show examples of this later in this article with both the command line and with GitKraken Client.
Git FETCH_HEAD
Any time you run a Git init, a ./git folder is created, holding the keys to helping Git do what it’s supposed to do. In each of these folders is a special file called FETCH_HEAD. The FETCH_HEAD file keeps track of all the branches that have been fetched recently, along with the commit SHA for the latest commit that exists on that particular branch on the remote.
This file serves a special function, as it can be used in a Git merge. In this case, Git will resolve the merge request for all branches that are available to be merged in FETCH_HEAD. This happens automatically when a Git pull is performed instead of just a Git fetch.
Git Fetch from Multiple Remotes with FETCH_HEAD
You can reference multiple versions of a branch from multiple remote repos within FETCH_HEAD. By default, running a Git fetch will overwrite the whole FETCH_HEAD file with each run.
However, by using the --append option, or just -a, with Git fetch, Git will instead add those additional fetched branches to the FETCH_HEAD file. Running a git merge FETCH_HEAD will merge all of those commits from the various remotes, all in one step! 💥
Keeping track of all the remotes for a repo doesn’t need to be complicated. Download GitKraken Client for free to visualize and better understand your repositories today!
Git Fetch Remote Branch
As you have read, Git fetch is designed to download changes to a remote tracking branch on your local computer. But how does Git fetch know what branch and what remote you intend to download the changes from, especially when more than one remote is available? The best practice is to specify both the remote and the branch we want when you run Git fetch.
If you run git fetch with no other options or subcommands, Git will assume you want to fetch from the default upstream and whichever branch is currently checked out. The default upstream for a branch is normally the first one created, typically the upstream where the code was originally cloned. If you examine the .git/config file, you can quickly see what upstream is associated with each branch.
By declaring specifically which remote and branch you want to target with a Git fetch, you can be certain that you’re getting updated code from the correct source.
If you have a lot of branches and a lot of remotes, you can save a good deal of time by relying on git fetch –all. The --all option tells Git to try and fetch any branch that has changes not present locally from all possible remotes.
error: cannot open .git/FETCH_HEAD permission denied
Sometimes, when you perform a Git fetch or a Git merge against FETCH_HEAD, your CLI shell will return an error that says: error: cannot open .git/FETCH_HEAD permission denied.
There are a number of reasons why this can happen, but most often, it’s because you don’t have the right user permissions to update or access the FETCH_HEAD file.
To solve this error, make sure you’re logged in as a user who has read-write privileges to the Git repository with which you are working. Alternatively, you can modify file permissions to either allow more users access with chmod, or change file ownership to yourself with chown.
How to Git Fetch in the Command Line
Before you perform a Git fetch, it’s a good idea to see which Git remotes are available for repo. To see all available remotes, use the command:
git remote -v
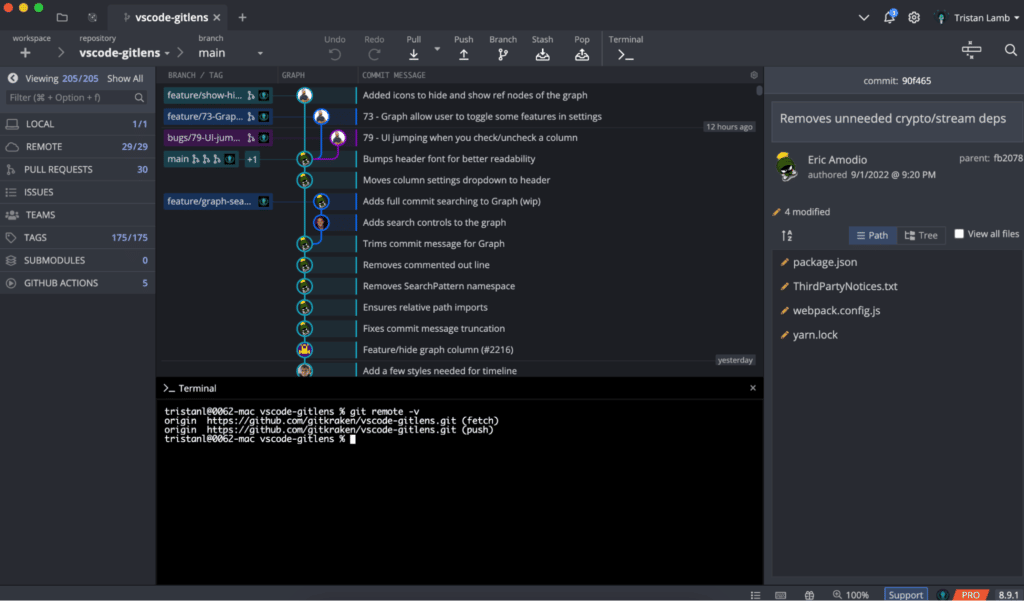
In the above example, there are three available remotes to download changes from: origin, where the repository was originally cloned to the local machine, gitkraken, which is the upstream updated by the owner of the GitLens product, and gitlab, which is a copy of the repo over on GitLab.com.
Using Git Fetch in the CLI
To perform a Git fetch against the branch currently checked out, downloading changes from the default upstream repository, use the command:
git fetch
In the above example, Git downloaded a change from the remote origin for the branch fetch-example. If there were no changes to download, the Git fetch command would not have produced any output, as there would be nothing to show.
Using Git Fetch Remote Branch in the CLI
To target a specific branch on a specific remote, use the following command:git fetch <remote> <branch>
Make sure you replace <remote> with the name of the remote you want and <branch> with the desired branch name.
In the above example, the remote is gitlab, and the branch is fetch-example. This command will update the remote tracking branch: gitlab/fetch-example, and update FETCH_HEAD.
Now, you can merge all the changes locally with the following command:
git merge FETCH_HEAD
How to Git Fetch with GitKraken Client
One of the best parts of using GitKraken Client for this action is that the tool automatically performs fetches for you!
Unlike the Git CLI, GitKraken Client can maintain a connection with the various remotes and perform a Git fetch for you in the background as frequently as once per minute. You can see the downloaded changes for the remote tracking branches as entries in the Git commit graph in GitKraken Client, shown below.

To apply the changes to your local repo, simply double-click the remote tracking branch entry on the commit graph you want to apply changes from. GitKraken Client will ask you to confirm that you want to “Reset Local to Here.” Click the Reset Local to Here button, and GitKraken Client will perform the merge.

To adjust the frequency in which GitKraken Client performs automatic fetches, navigate to Preferences → General.
The first option shown is Auto-Fetch Interval. You can adjust this to be as often as every minute, up to every 60 minutes. You can disable the Auto-Fetch feature by setting the frequency to 0.

GitKraken Client makes it easy to see what is going on in your repository and keep on top of changes from multiple remotes! And features like Auto-Fetch add more convenience and peace of mind than working in the terminal alone.
GitKraken Client…that’s so Fetch
GitKraken Client makes it easy to work with remote repositories, no matter how many other collaborators are updating code. This legendary Git tool makes it much simpler to stay up-to-date with changes with Auto-Fetch capabilities, and seeing code changes is as simple as clicking on a file name on the right panel.
This is just one of the many ways GitKraken Client can make your life better as a developer when collaborating with others. Download and start using GitKraken Client, the legendary cross-platform Git client, today!


