Git allows you to take snapshots of your work over time with Git commits. While you can always go back and see your work at any point with Git checkout, if you have a lot of commits, it can quickly become confusing trying to remember what commit contains an important milestone or feature-ready code. This is where Git tag comes in.
Git tag is a command that attaches a pointer to a specific commit with a human readable. Unlike other pointers in Git, Tags do not move once set; they will always point to the same commit in your project history. Git tags are also commit-ish references, meaning they lead to specific commits and can be used for operations like Git checkout, Git push, or Git diff.
One common use case for Git tags is in the process of releasing code that is ready for use. For example, looking at the GitLens project repository, you can see every release tagged with a release number. However, you can use tags to mark your place for any number of reasons. While tags are not movable, they are easy to create and delete, so you should not hesitate to try to use Git tag any time you want to mark a commit for any purpose.
In this article, we’ll explore the following ways to leverage Git tags:
- Lightweight Git Tags
- Annotated Git Tags
- View a List of Git Tags
- Delete a Git Tag
- Create Git Tag in the Terminal
- Using Git Tags in GitKraken Client
- Using Git Tags in GitLens for VS Code
If you’re looking to expand your knowledge on Git tags, take a look at these related articles:
Lightweight Git Tags
Lightweight Git tags are simply a named pointer you can reference. They are called lightweight because the only thing they contain is the tag’s name. Since it is connected permanently to a commit, it will show the commit message in place of any additional information when examined. If you want to add a custom message to a Git tag, you will want to use Annotated tags.
Annotated Git Tags
Annotated Git tags are tags that contain a custom message in addition to the name of the tag. An annotated Git tag normally carries information beyond what is contained in the commit message the tag points to. This could be some specific feature or product information or just a reminder of why you made the tag. Annotated tags are appreciated when working on a large project with many contributors, as the name of the tag is often not enough to explain why a tag was created.
Git Tag List
To see the Git tags associated with your repository, you have a couple of options.
First, Git tags do show up in your Git history. When you run a git log or a git log –oneline Git will show the tags beside the commit ID.
The other way to see all the tags is to list them with the command git tag –list
This will just show the of tag names in ascending order alphabetically. If you want to see the annotations associated with the tags, you will need to use the option -n. The command is git tag –list -n
Note how all of the tags show an annotation. If no annotation was manually set by the maker of the tag, the -n option will show the commit message associated with the commit the tag is pointing at.
Git Delete Tag
Sometimes you realize that the Git tag you created has an issue. You might need to update the naming convention or maybe you added the tag to the wrong commit. The easiest solution here is to just delete the existing tag and create a new one. Deleting Git tags is simple thanks to the -d option. To delete a Git tag use the command
git tag -d <tag-name>
Remember to replace <tag-name> with the name of the tag you wan to delete.
Git Tags in the Terminal
To create a lightweight tag in the Git CLI, use the command
git tag <tag-name>
Remember to replace <tag-name> with the name of the tag you want to create.
To create an annotated tag in the Git CLI, use the command
git tag -a <tag-name> -m '<message>'
Remember to replace <tag-name> with the name of the tag you want to create and <message> with the message you want to use for the annotation.
To list the tags, along with their annotations, use the commandgit tag --list -n
git tag -d <tag-name>
Remember to replace <tag-name> with the name of the tag you want to delete.
Git Tags in GitKraken Client
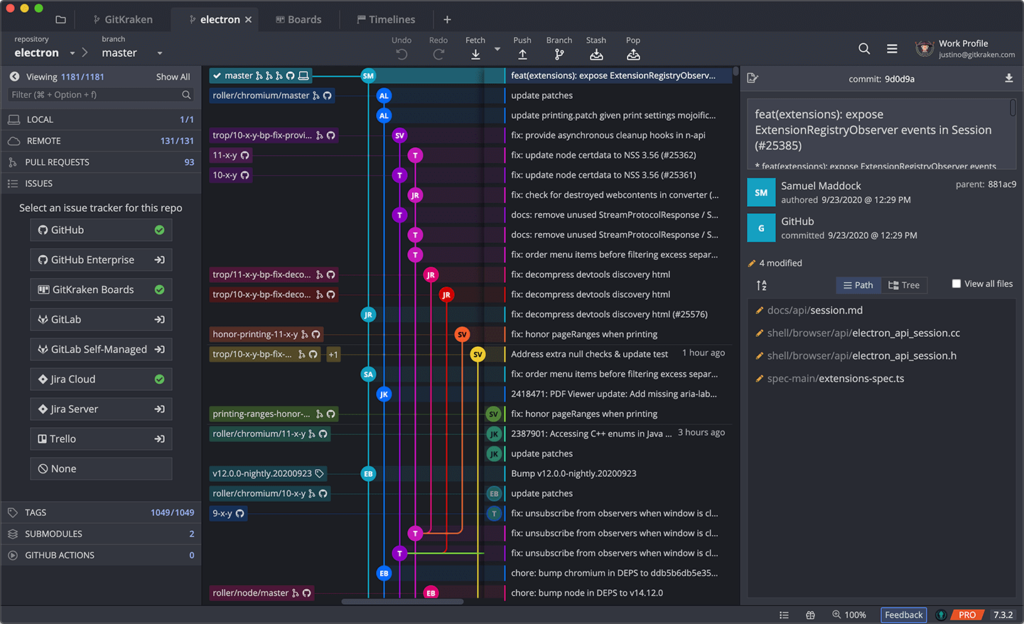
GitKraken Client makes it exceptionally easy to work with Git tags. You can see the all the Git tags in GitKraken Client in the Tags section of the Left Panel. GitKraken Client conveniently displays the Git tags in reverse chronological order, meaning the newest tags are always at the top for convenience.
It is super easy to work with Git tags in using GitKraken Client’s built in terminal or with a few simple clicks.
In order to see Git tag annotations in GitKraken Client, hover over the tag icon beside the Git tag in the Commit Graph.

Clicking on a tag will jump the commit graph to that particular Git tag in your commit history.
Note: if you click on a commit that is not loaded into GitKraken Client Commit Graph it will not show this in the graph. You would need to adjust the range of commits that are loaded from the Preferences –> General menu.
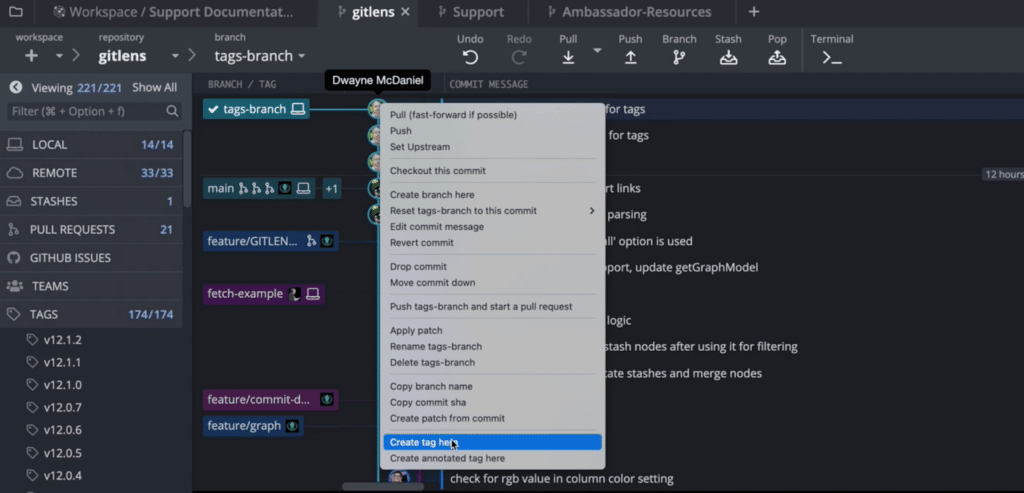
To create a new Git tag using GitKraken client, right mouse click the commit you want to add the tag to and select either the Create tag here or Create annotated tag here options.

If you pick the Create annotated tag here GitKraken Client will open an interface to allow you to type the desired annotation.

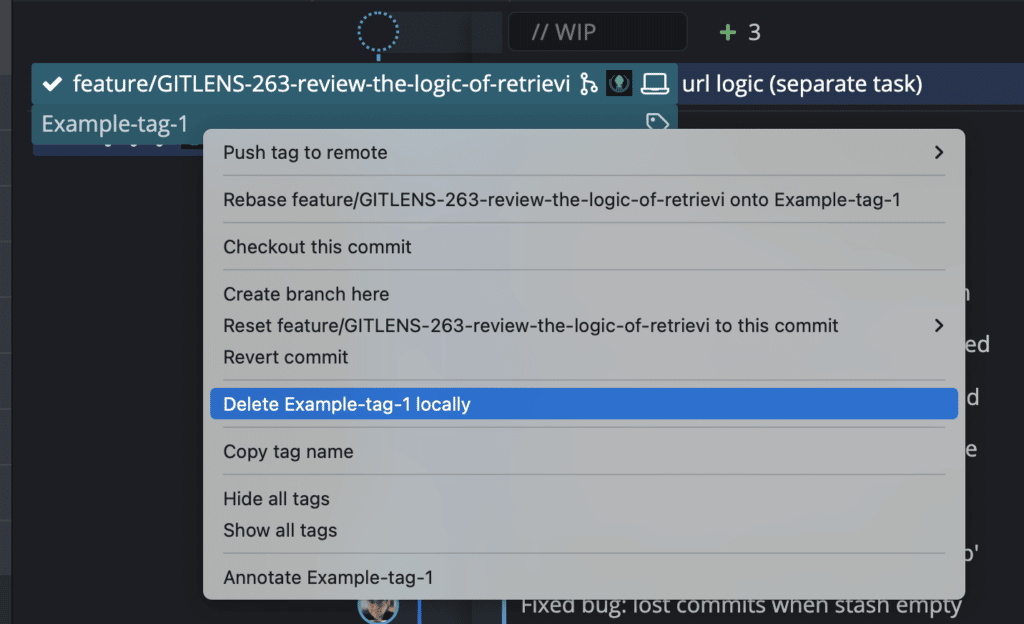
To delete a tag in GitKraken Client, simply right mouse click the tag you want to delete and select Delete <tag-name> locally.

Git Tags in GitLens for VS Code
Working with Git tags in VS Code is very straightforward when you use GitLens. GitLens exposes Git Tags as a GitLens Side Bar section. Opening this section will list all the tags present along with their annotation.
To create a new Git tag in GitLens, navigate to the Tags Side Bar section of GitLens and click the + icon. GitLens will open a an interface to guide you through creating a new tag.
To delete a Git tag with GitLens in VS Code, right click on the tag you want to delete and choose the option Delete Tag
Start Leveraging Git Tags
No matter how you make and manage Git tags, they can help you make sense of your Git history by letting you add messages to any commit that marked a milestone. Wether for a release candidate, a new feature’s introduction, or just to make it easy to find a snippet of code later, tags are a great way to stay organized. GitLens and GitKraken Client can both give you a better view of you tags and a more efficient way to manage them. If you are using VS Code, install and start using GitLens today. No matter what your code editor of chouse is, GitKraken Client, the legendary cross platform Git client can help you manage your repos and collaborate better with others!


